mingcute_left-fill
mingcute_left-fill
mingcute_left-fill
mingcute_left-fill
mingcute_left-fill
Manage Work Orders

Manage Work Orders

In any MRP (Manufacturing Resource Planning), the work order (WO) is crucial. In Brytebuild, a WO initiates a job. It monitors the work and time involved. WO assists an individual or group in producing the necessary item. It offers detailed instructions on how to undertake a certain task. After reading this page, you will learn how to allocate a job WO to an individual or group, how to commence a WO, and how to conclude a WO.

Create Work Orders/Schedule

Let’s first discuss how to create a schedule/work order. To create a schedule, navigate to the schedule page from the dashboard and click “create schedule“.

  • The user option is utilised when you wish to allocate a schedule to a single specific user, and the group option is employed when you intend to assign a schedule to a group of members/staff.
  • The order option is used when you aim to directly attach a scheduled job to a sales order.
  • The non-order option is applied when there is no sales order for that job schedule, or you decide to attach a sales order later.
  • Types are used to assign a category to the schedule, e.g., training, development, building, etc.


The automatically picking option will generate a picking for this job schedule.

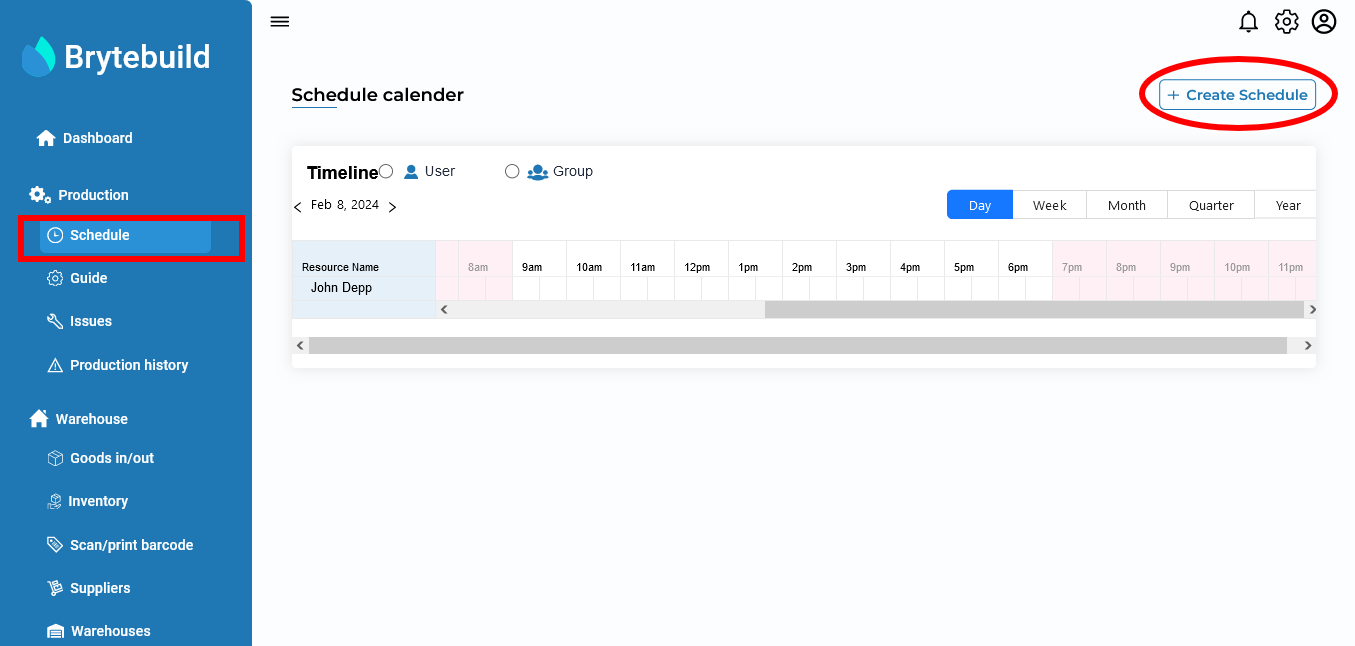
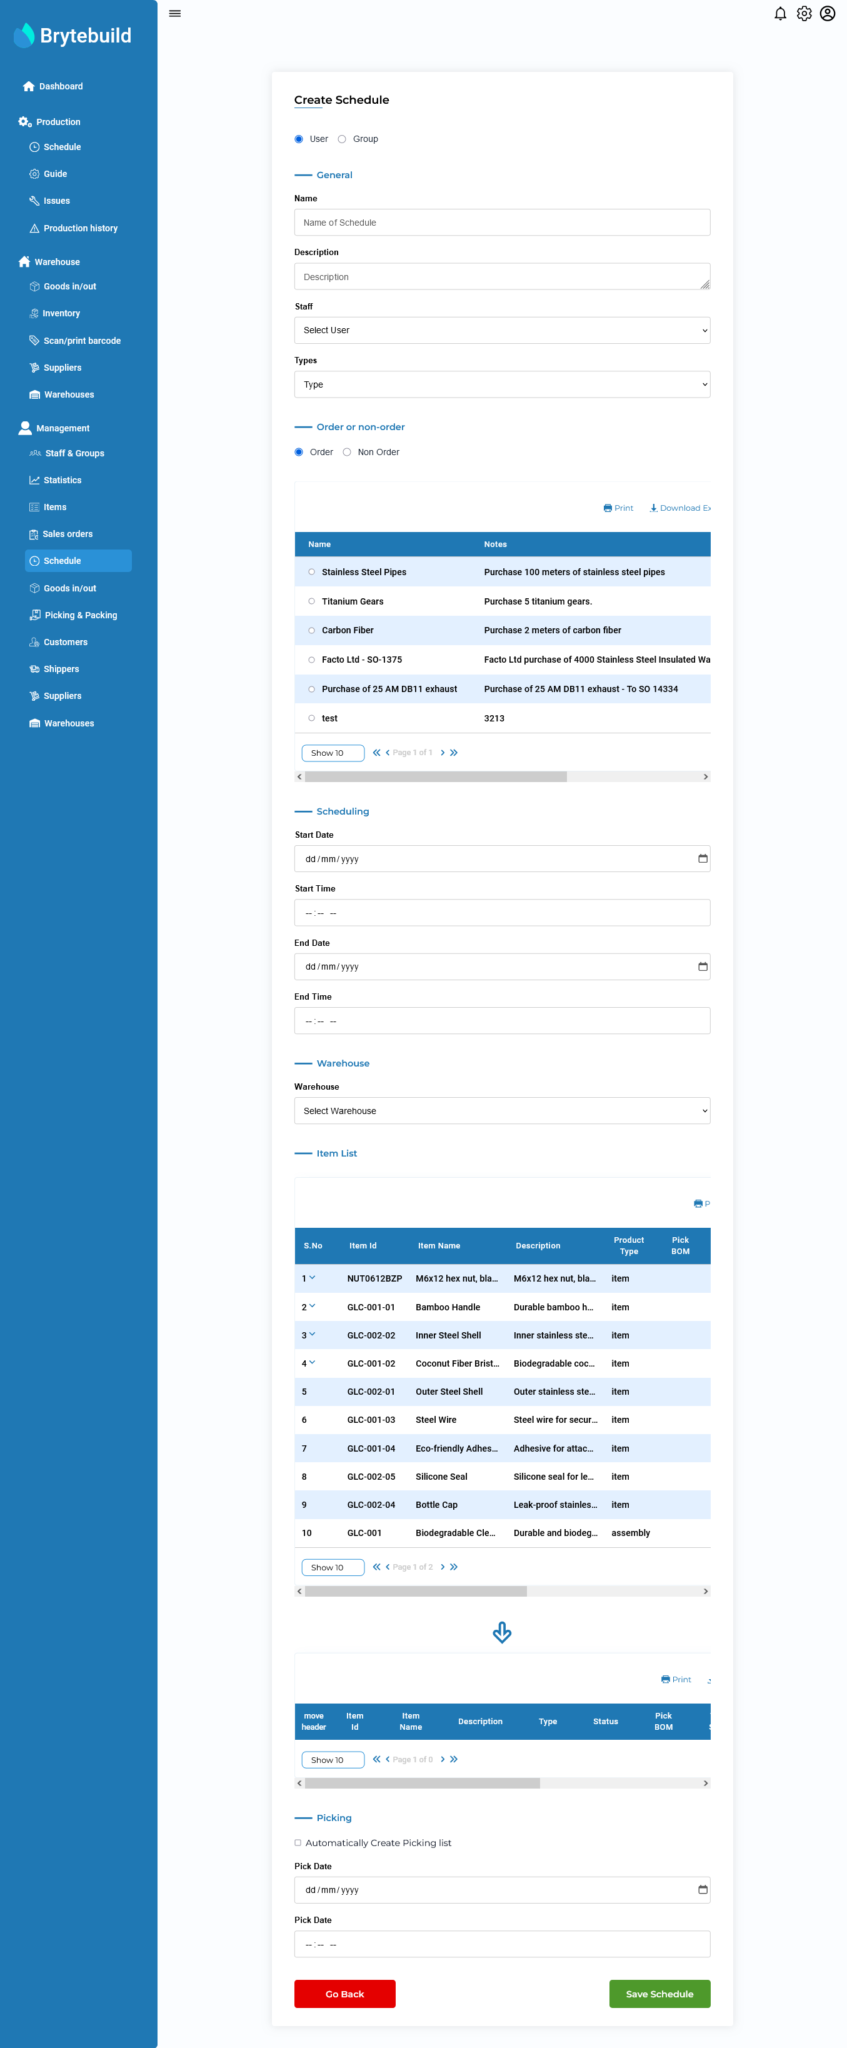
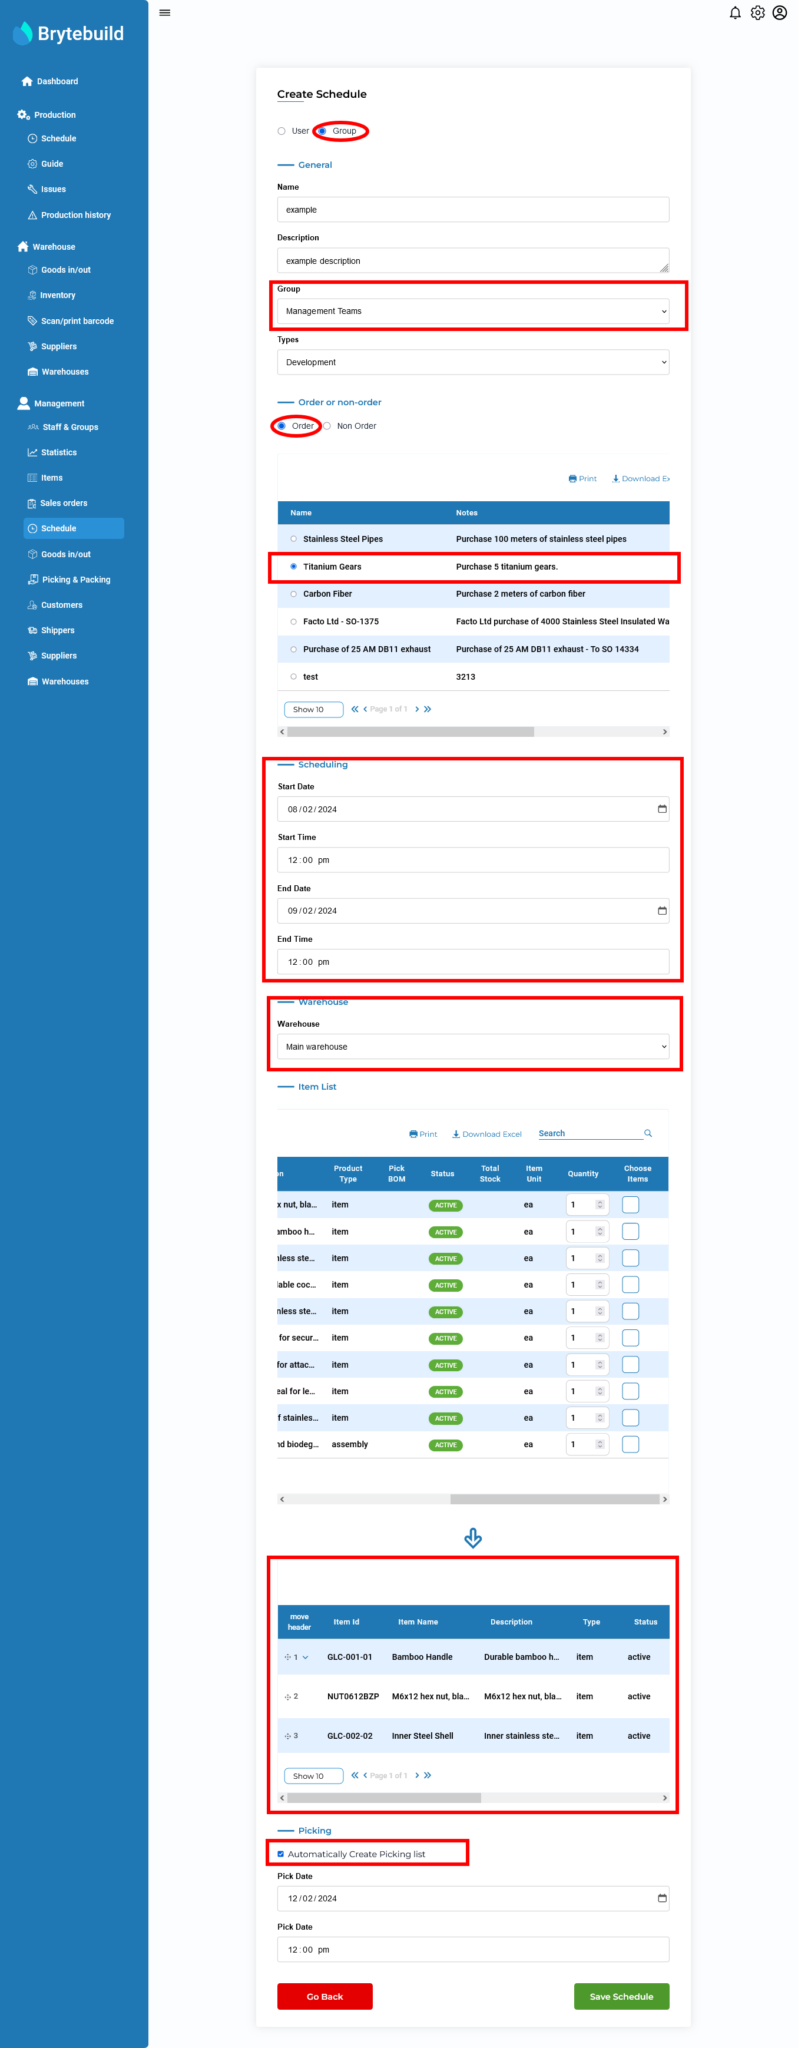
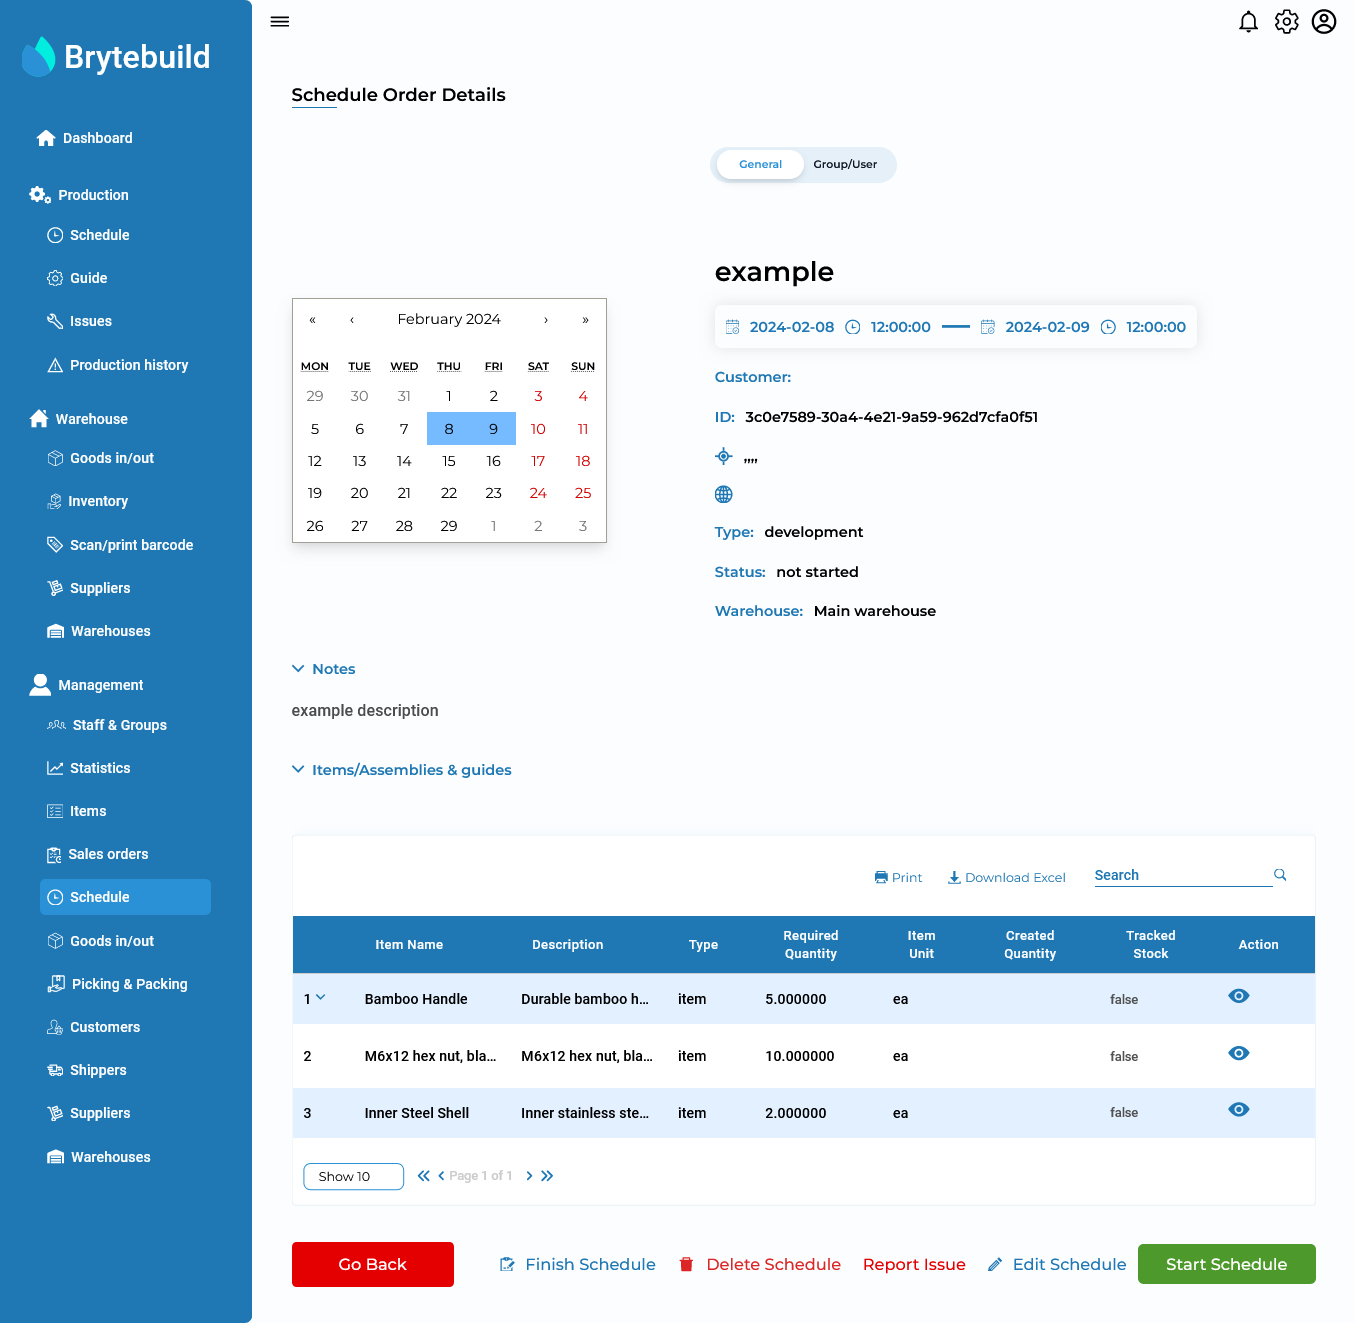
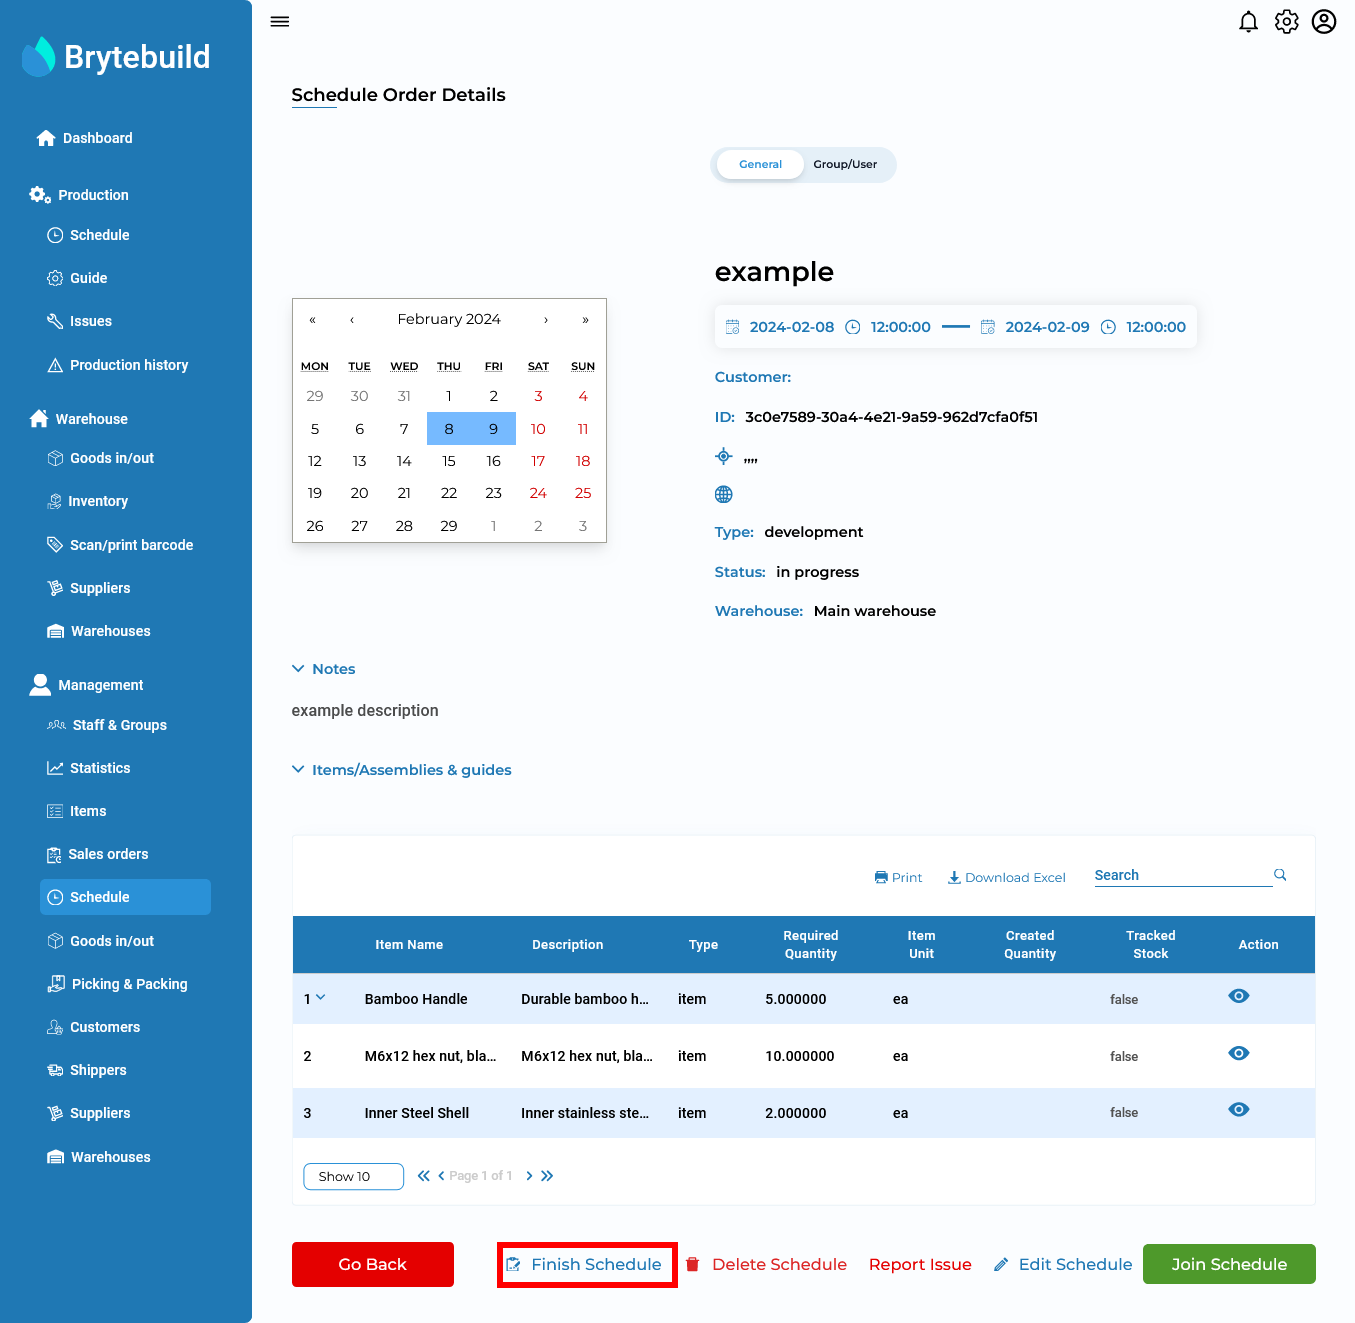
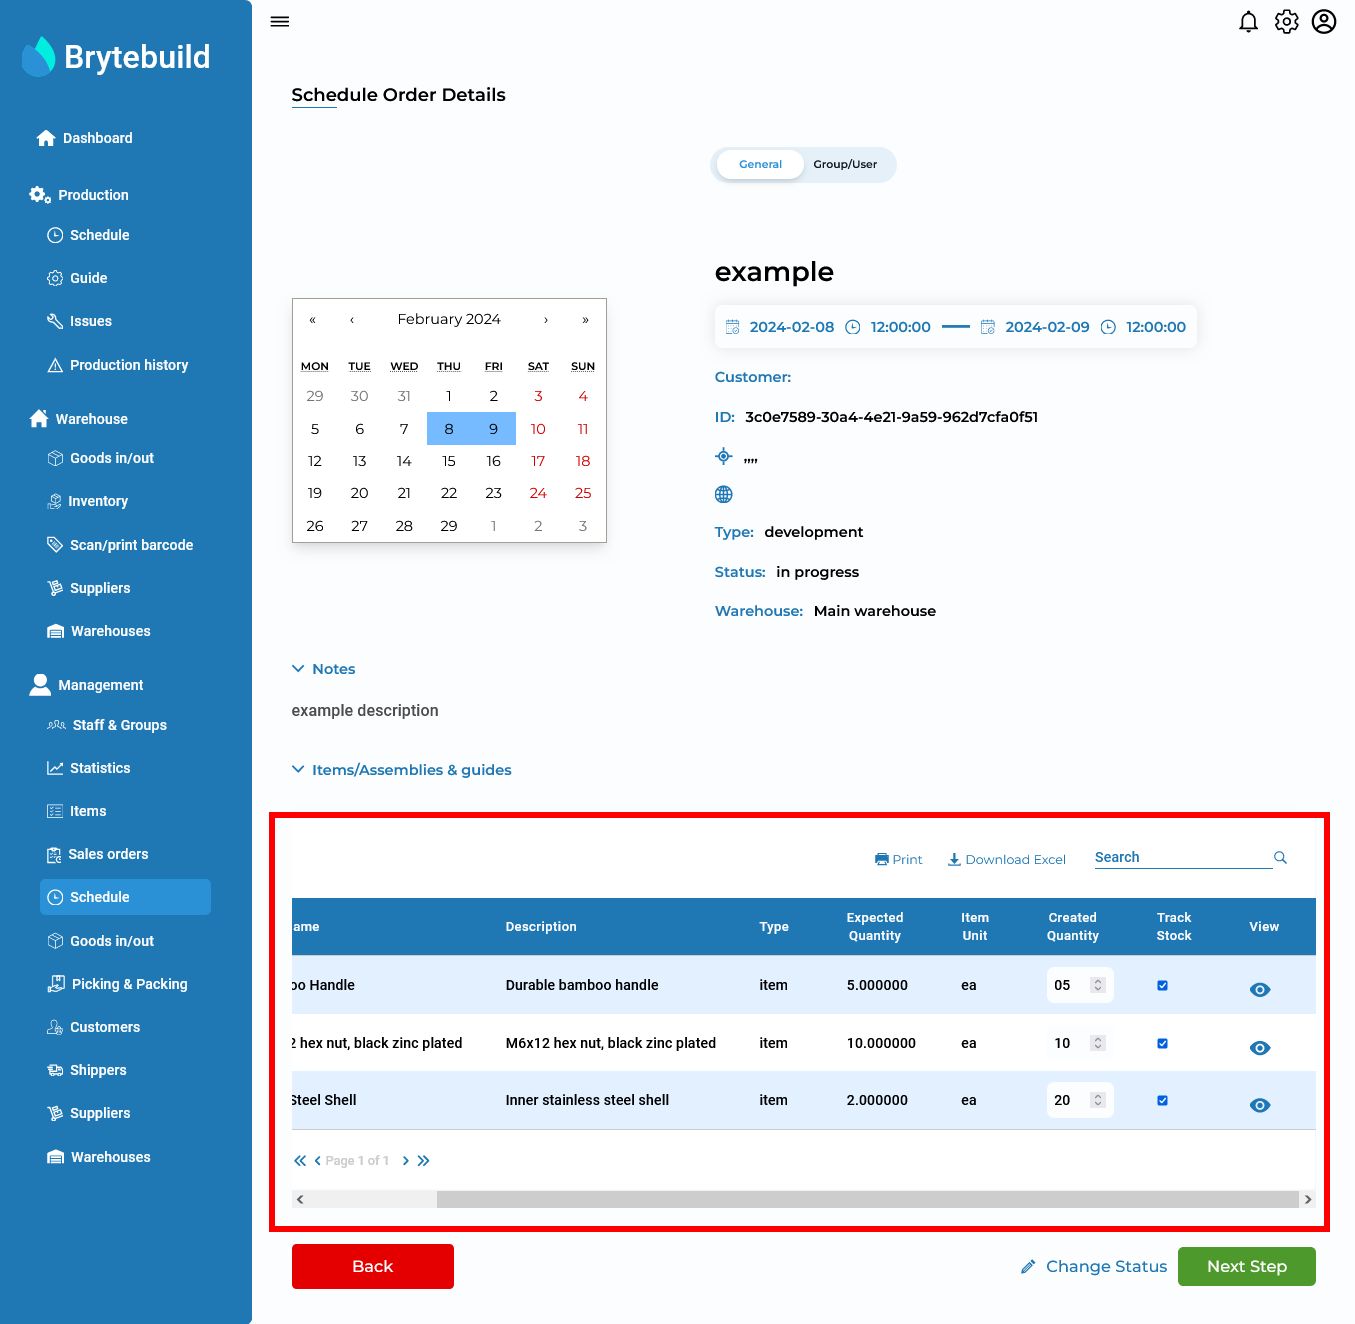
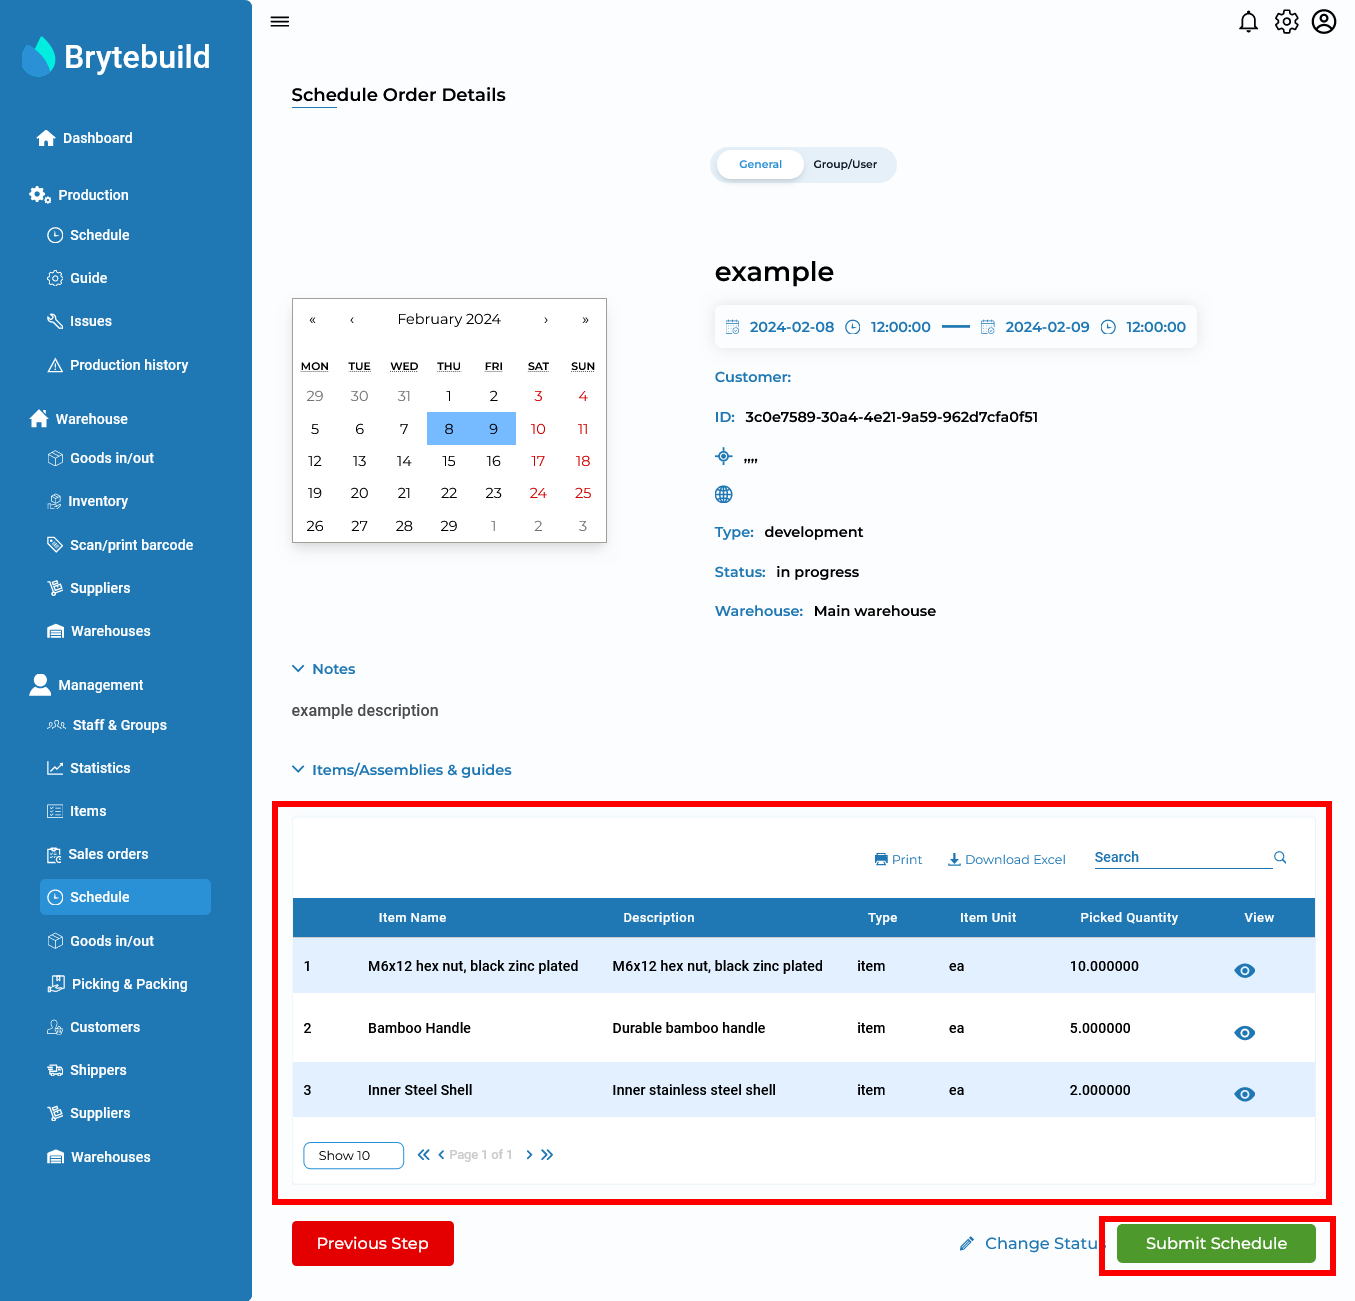
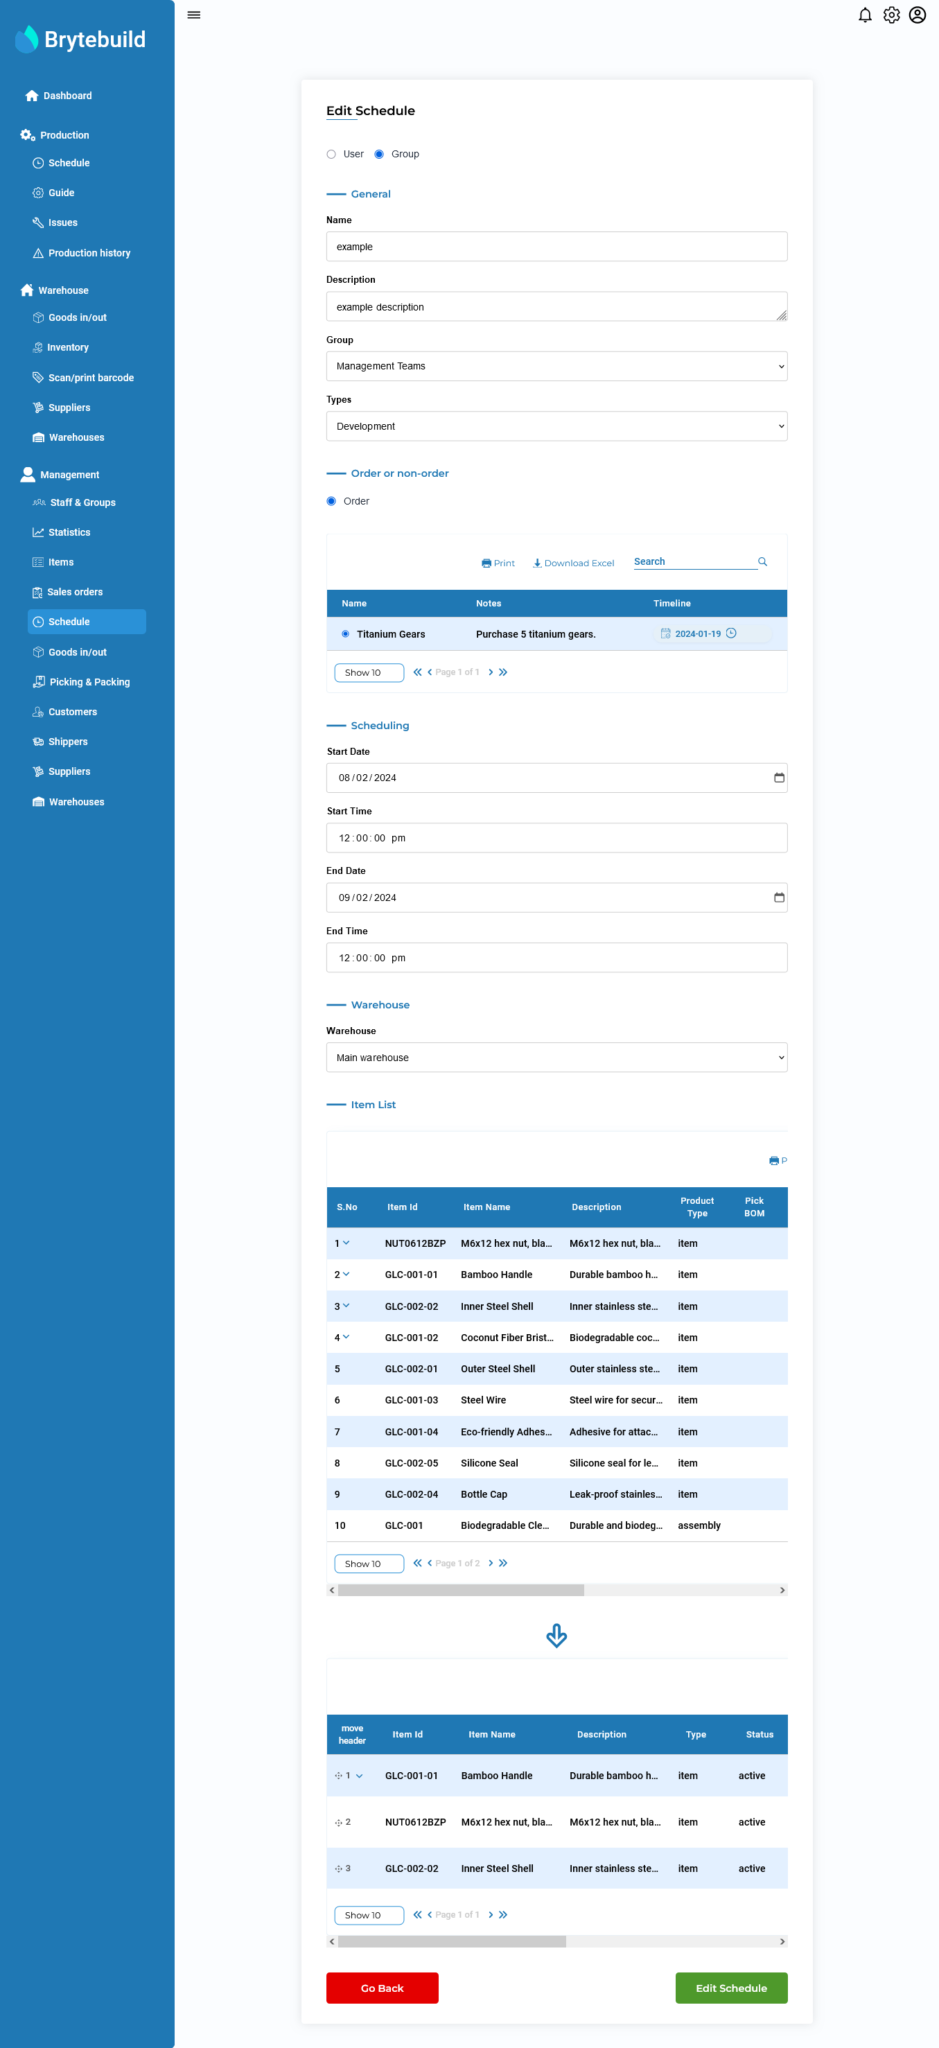
Now, let’s create a job schedule for a group. First, let’s choose the group option. Next, let’s input the name of the job schedule and its description. Now select a group, then choose the type of job schedule. For this example, let’s select the order type and attach a sales order to this schedule. Proceeding, let’s specify the starting date/time and ending date/time. Now select a warehouse. Let’s then choose items for this job schedule. For this example, let’s also create a picking by ticking the picking option.

View Details of Schedule/Wok Order

To view the details of a schedule, navigate to the schedules page from the dashboard and click on the pencil icon next to the schedule you wish to see.

The schedule details page contains details of your schedule e.g name, description, items etc. The schedule page has two tabs General to see general details and Staff/Group tab to see staff/group information that are attached to this schedule. In the schedule details page you can perform finish, delete, edit and start/join schedules operation by pressing relevant buttons.
Schedule has three status “not started” which is default status, “in progress” and “completed”. To start a schedule click on start schedule.

After clicking on the start schedule button, the schedule will appear on the schedule calendar, which we will discuss later. After starting a schedule, you can now join the schedule; we will cover how joining a schedule works later on this page.

How to Join Schedule/Work Order?

Why would you want to join a schedule? Joining a schedule provides the user with step-by-step working instructions on how to proceed with the job and outlines the requirements for each step. To join a schedule, ensure that the schedule has been initiated. Press the join schedule button and select a product for which you wish to see step-by-step working instructions

charm_pin

Note

To see what are work instructions? click here.

How to Finish Schedule/Work Order?

To finish a schedule, navigate to schedule details page and press finish schedule button.

On the finish schedule page, enter the quantity of the items that are made in this schedule and check for tracked stocked and then press next step.

charm_pin

Note

To know what are tracked stock? click here.

On the following page, verify the picking details and ensure they are correct. Afterwards, press submit schedule. Now your schedule is completed.

charm_pin

Note

If the job schedule lacks a picking list, then the table will be empty.

Edit Schedule/Work Order

To edit a schedule go to schedule details page and press edit schedule button. On the edit schedule page edit information and press submit to save changes. You cannot edit completed job schedule and also you cannot change schedule form order to non-order, vice versa.

Scroll to Top